Category Archives: Carbs/Starch

pasta-beans-sage-soup

The kids in the kitchen

Skip the preliminaries; go directly to the recipe for pasta, cannellini beans, bacon, and sage soup

School’s out this week. The DD is immediately plunging into an intensive summer course to learn a year’s worth of Japanese in 6 weeks, and the DS is whiling away the week learning how to survive on a deserted island. Don’t ask me; this is their idea of fun. I generally let them choose summer camps and activities that they want to do, but this summer, I’m also asking them to plan on cooking one meal once every other week. I tried to suggest that they do it once a week, but a tidal wave of groans and complaints drowned me out.

The rules are simple. It can be any meal of the day, as long as it involves planning and cooking. Making a cheese sandwich does not count, unless they make the bread and the cheese. OK—maybe not the cheese. But it needs to be a well-balanced meal with carbs, protein, and vegetables (or fruits). That cheese sandwich would need to be accompanied by a salad, or have lots of veggie toppings in addition to the cheese. Heating up leftovers does not count. The meal can be something that they have had in the past; it does not have to include dessert. We adults will shop for the ingredients once they’ve supplied a list of what they need, and we’ll supervise and help, but they will be in the driver’s seat.

I keep trying to create opportunities for my kids to learn and practice cooking skills because when they leave home (for college, I hope!), basic cooking know-how should be among the life skills they have: that and not turning their white t-shirts pink in the laundry (not that I did that two weeks ago), cleaning up after themselves, taking public transportation, managing money, having healthy relationships…. can I lock them up in a closet yet?

Anyway, I thought I had cooking—at least—covered. For a couple of years, we organized a Lunch Club with a group of my friends’ kids. They had to present recipe ideas, create a balanced meal plan, make sure the ingredients came in within budget ($5 per person, which we adhered to strictly), cook the meal (without adult help, at least in theory), and clean up (the last was mostly theoretical, since the moms couldn’t seem to help ourselves, and we’d end up cleaning up when the kids melted away to play capture-the-flag). The kids made luxurious meals, like fettuccine with peas, asparagus, and pancetta; roasted baby vegetables; and strawberries with chocolate caramel sauce. Or like fresh tomato salsa on cheese-and-spice tortilla chips; flank steak with corn-tomato relish and grilled garlic bread; and fruit salad with citrus syrup. There were very few dishes that were off the mark, only one cut finger, and no burns. But within two years of the Lunch Club’s demise, the DD seems to have forgotten how to measure flour and the DS is afraid to handle an 8” chef’s knife! Sigh—one step forwards and two steps back.

So I’m back, encouraging them to take up cookbooks and colanders again. Don’t tell them, but I hope this is a habit they will continue even after school starts again! The DD has nominated pasta, cannellini beans, bacon, and sage soup as the first main course they make. It’s one of their favorite dishes, and always among the first ones they request when asked to give input on the weekly menu plan. They’ll have to add on a vegetable side dish, and decide whether to do a dessert or not. Hmmm… I wonder if they remember how to make chocolate lava cakes with whipped cream like they did for Lunch Club?

Recipe: Pasta, cannellini beans, bacon, and sage soup

Makes 4 generous servings

This recipe is adapted from Beans & Rice by Joanne Weir (Williams-Sonoma Kitchen Library, 1994). The ingredient quantities are flexible; feel free to put in more or less of any particular ingredient to suit your taste!

Ingredients

  • 2 cups dried cannellini beans
  • 1 tablespoons extra-virgin olive oil
  • 4 ounces lean bacon, thinly cut crosswise
  • 1 medium yellow onion, chopped
  • 3 cloves garlic, minced
  • 1 (28-ounce) can diced tomatoes
  • 2 tablespoons fresh sage, chopped
  • ¼ teaspoon red pepper flakes
  • 4 cups low-sodium chicken broth, plus additional if desired
  • 8 ounces dried pasta, such as shells
  • salt and freshly ground black pepper, to taste
  • for serving: freshly grated Parmesan cheese

Preparation

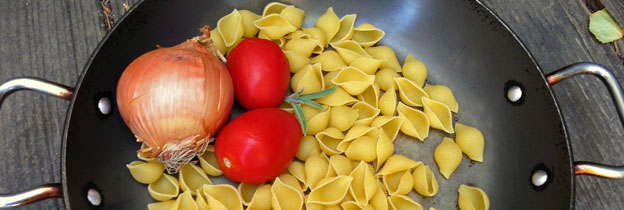
Make the beans. Pick over and discard any stones or damaged beans. Put the beans in a colander and rinse them with water. Transfer them to a large bowl, cover with water by 2 inches, and allow them to soak for at least 3 hours or overnight. Alternatively, quick-soak the beans by transferring them to a medium saucepan; add water to the saucepan to cover the beans by 2 inches. Bring the beans to a boil, cover the saucepan, turn off the heat, and allow the beans to soak for 1 to 1-½ hours.

After soaking, drain the beans, put them into a medium saucepan, cover the beans with water by 2 inches again, then bring the water to a boil. Boil the beans, uncovered, for 5 to 10 minutes, then turn the heat down to low, and simmer the beans until they are soft and cooked through, approximately 1 hour. Check the beans as they cook to make sure they are always completely covered by water, adding more water if necessary. Beans may be prepared in advance. Cool completely, and store in cooking liquid, tightly covered. Drain the beans, and proceed with the recipe.

Make the soup. In a 4-6 quart soup pot over medium-low heat, warm the olive oil until it shimmers. Add the bacon, onion, and garlic; sauté until bacon and onion begin to brown, about 10 minutes. Add the tomatoes, sage, and red pepper flakes, and bring to a brisk simmer; turn the heat to low, and simmer for 15-20 minutes, stirring occasionally. Turn the heat up to medium-high, and add the broth and beans. Return the soup to a slow boil, then turn the heat back down to low, cover partway, and simmer for another 15-20 minutes to meld the flavors, stirring occasionally. Turn the heat up to medium-high, and bring the soup up to a slow boil, add the pasta, and cook  until the pasta is al dente. Add more broth or water to thin the soup if it is too thick. Add salt and pepper to taste.

Serve the soup, hot, with Parmesan sprinkled on top.

Tips: Substitute 2 (15-ounce) cans of cannellini beans for the dried beans; drain and rinse the beans before proceeding with the recipe. If you have fresh tomatoes and homemade broth, substitute them for the canned ingredients.

halfgiving-2013

Happy Halfgiving! Or, how we came to celebrate Thanksgiving twice a year

(Skip the gabble; get ready to gobble! Go straight to the recipe for puréed sweet potatoes with Grand Marnier and buttered pecans.)

A sudden cacophony of pin-ball machine clangs, rings, and pings deluged the sunny room where I was working. I jumped in my seat. It was my phone, set to the most annoying ringtone possible. On the other end was the DH, at the supermarket: “Hey.”

“What’s up?”

“Did you mean to have yams and potatoes on the list?”

“Er…. No? Why do we need to have yams and potatoes?”

“How can we have Halfgiving without yams or potatoes?”

Let me explain: my family loves Thanksgiving. Not that we have a zeal for proto-American why-can’t-we-all-just-get-along historical fantasies. For us, it’s a celebration of fabulous late-fall harvest food and a momentary pause to recall the many blessings in our lives. (And if I keep saying the second part, maybe the DD and the DS will actually believe it one day!) We love Thanksgiving so much that not only do we celebrate Thanksgiving, we make more sides to join the leftovers in the days following Turkey Thursday (who needs Black Friday?) because even we recognize that it would be a tad crazy to try to make all the dishes we absolutely can’t do without on Thanksgiving Day itself. We love it so much that a few years ago, the kids declared that we also need to celebrate Halfgiving, six months after Thanksgiving. So every year, on the weekend following the fourth Thursday in May, we make Thanksgiving Dinner Lite.

So when the DH made his urgent call from the grocery store, I knew I had crossed the line. You see, I had planned on making the buttery fantail rolls that we all love, plus stuffing, so I thought that would more than take care of carbs for the four of us. What was I thinking!? Who am I to tamper with Tradition? Yams were duly, and speedily, added back into the lineup. It was really a no-brainer; we’ve been making these heady, citrusy yams for Thanksgiving since before the kids were born. And, yeah, yeah: technically, they’re sweet potatoes (so that’s the way I’ve labelled them in the recipe), but I grew up calling them yams, and between you and me, that’s what I’m going to keep calling them.

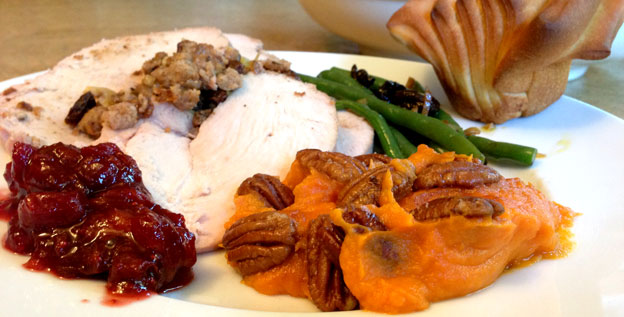
Here’s our final menu for Halfgiving 2013:

  • Grilled, stuffed turkey breast
  • Green beans with walnuts and dried-cherry dressing
  • Puréed yams with Grand Marnier and pecans
  • Buttermilk fantail rolls
  • Cranberry-orange sauce
  • Gravy

It’s not as extravagant as the actual holiday, but it tides us over until November when we can really do it up right. BTW, the DD and DS are still lobbying for Halfmas, but we’ve told them not to hold their breaths.

sweet-potatoes-and-pecans

Recipe: Puréed sweet potatoes with Grand Marnier and pecans

Serves 5-6

Ingredients

  • 2 cups pecan halves
  • 5 tablespoons unsalted butter, softened, divided
  • 1 teaspoon coarse kosher salt
  • 4 large orange-fleshed sweet potatoes (like Red Dianes, often labelled “yams”), about 4 lbs.
  • 2 tablespoons Grand Marnier, or another orange-flavored brandy liqueur
  • ½ teaspoon salt
  • 2 tablespoons packed light brown sugar

Preparation

Preheat oven to 325°F. Place pecans in a shallow roasting pan in one layer. Roast in the middle of the oven until fragrant, about 8 minutes. Remove from the oven, and immediately toss with 1 tablespoon of the butter and kosher salt, stirring until coated evenly. (The pecans can be made up to 2 days ahead, cooled to room temperature, and stored in an airtight container.)

Increase oven temperature to 425°F. Prick each sweet potato 6-8 times all over. Place on a roasting pan lined with parchment paper or foil. Roast them in the middle of the oven until easily pierced through the middle by a fork, about 1 hour.

Reduce the oven temperature to 325°F.

As soon as the sweet potatoes are cool enough to handle, peel half of them them, and place them in the work bowl of a food processor. Add 2 tablespoons of Grand Marnier, ¼ teaspoon of salt, and 2 tablespoons of butter. Purée the sweet potato mixture until smooth. Scoop the purée into a gratin dish. Repeat with the rest of the sweet potatoes, Grand Marnier, salt, and butter. Level the sweet potato mixture in the casserole dish. (The sweet potatoes can be made up to this point a day ahead. Cool and cover before storing in the refrigerator. Bring to room temperature before proceeding.)

Arrange the pecans in one layer over the top of the sweet potato purée, and sprinkle with the brown sugar. Bake in the middle of 325°F oven until heated through and pecans are slightly browned, approximately 30 minutes (or, 35-40 minutes, if starting from room temperature purée).

Pancakes anyone?

King Arthur White Whole Wheat Flour is the pancake of my eye

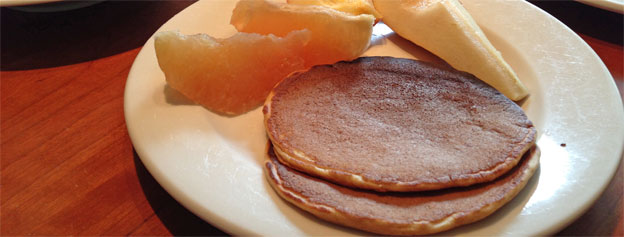
As I flipped pancakes on a recent Saturday morning, I was thinking about how much more baking I’ve been doing recently (skip the chatter, and go straight to the recipe). For instance, besides the pancakes, the day before, I made whole wheat walnut-raisin bread, and that night, the DH was going to be making pizzas, one with pepperoni and one with sausage and green bell peppers. Yeah, yeah, I know, pancakes aren’t baked; the actual connection is the main ingredient, flour (but I do keep the pancakes warm in the oven, wink), and when I think flour, I think baking.

A couple of different things led to this state of affairs. It all started last summer, when a friend shared a lemon muffin with me that she made with King Arthur White Whole Wheat Flour (thanks, Michele!). We could’ve been in an ad, all exclamatory remarks: “You’ve gotta try this!” “This is made with whole wheat flour? No way! It’s so light, and the color is like regular flour!” Then she gave me a bag with a couple of cups in it, and I started playing with it. I began substituting the white whole wheat flour in muffins, cookies, and brownies, starting with just a quarter of what the recipe called for, then a third, and now, depending on the recipe, half or all the flour. Everyone—the family, my adult friends, the kids’ friends—continued to ask for my baked goodies (better than complements, I think), so it just encouraged me to try it in more recipes.

Eventually, I ran through the recipes I usually make and that I wanted to substitute in white whole wheat flour, but I was on a roll. And when my friend Julie asked me what she could do with her new stand-mixer besides bake sweet treats, I thought of bread. Now, I used to bake bread here and there—mostly things like challah and standard 1½ lb. loaves for sandwiches—before I had the kids, but bread making mostly fell by the wayside as I focused on my two bundles of joy. The big exception is pizza, which the DH or I still make from scratch, including the dough. But I love (who doesn’t?) that heady, yeasty perfume and slight crunch of cutting open a fresh-baked loaf.  I’m lucky that there are many great bakeries in the Bay Area, and I occasionally buy beautiful breads from Semifreddi’s, my favorite local bakery. Taking a page from my book Twice As Nice, I’ve taken to stashing a few of their wheat panini in the freezer to use on the fly. But the local bakeries don’t stock a large variety of whole wheat loaves, so I started keeping an eye out for recipes for whole wheat bread, especially bread which I can then freeze and then later, defrost just as much as I need. Goody! More baking! I’ve continued experimenting with both white whole wheat and regular whole wheat flours, and I’m sure that I will be sharing some recipes in the future.

Here’s what I learned: substituting some or all the the regular white unbleached flour with King Arthur White Whole Wheat in everyday recipes works well. If it’s not at your local grocery store, you can get it directly from King Arthur’s website or from Amazon. Since the nutrition profile of white whole wheat flour is the same as regular whole wheat, it’s a great way to bump up the healthfulness and heartiness of everyday baking (including pancakes and waffles!). The white whole wheat flour, milled from white spring wheat rather than traditional red wheat (according to the King Arthur website), is heavier than regular white flour, so it’s very important to use proper measuring technique to avoid a dense or dry end result: loosen up the flour by stirring it around inside its container (I suppose sifting the white whole wheat flour before measuring it would be the foodie thing to do, but frankly, I’m too lazy for everyday baking), then scoop the flour into your measuring cup. Finally, use a butter knife to scrape off the excess—never tamp it down! For every ½ cup of regular flour, substitute ½ cup minus 1 tablespoon white whole wheat. The white whole wheat does add a “tan” and a subtle nutty flavor to the dishes, which I think actually makes things like pancakes taste better. But I wouldn’t substitute it in cakes, pie or tart crusts, and other delicate baked goods; after all, treats are treats are treats. Leave ‘em alone, I say. There’s plenty of other ways to make our everyday cooking healthier; an easy way is to start with these pancakes with ½ cup, 1 cup, or all white whole wheat flour!

Recipe: Pancakes

This is my pancake recipe; I’ve used it for years, but now I usually make it with 1 cup white whole wheat flour. I even make it with all white whole wheat, which the DD prefers. It’s a good recipe to experiment with, because you can easily substitute ½ cup, 1 cup or all the regular flour for white whole wheat. Just remember to use proper measuring technique, and subtract 1 tablespoon for every ½ cup!

Makes about 20 pancakes

Ingredients

  • 1½ cups flour
  • 1½ tablespoons sugar
  • ¾ teaspoon baking soda
  • ½ teaspoon baking powder
  • ¾ teaspoon cinnamon
  • ¼ teaspoon salt
  • 1 cup lowfat buttermilk
  • ½ cup skim or lowfat milk
  • 3 large eggs
  • 1½ tablespoon canola oil, plus more for greasing pans
  • 1½ teaspoon vanilla

Preparation

Heat a serving plate in 150°F oven. Lightly grease a cast-iron double burner griddle pan with a little vegetable oil, and heat over low flame. If not using a cast-iron pan, after the pancake batter is ready, heat your preferred pan, greased a little vegetable oil, over medium-low heat until hot but not smoking.

Place all the dry ingredients into a medium bowl and whisk together; make a well in the center of the dry ingredients. Add the wet ingredients to the dry ingredients and whisk just until smooth. Let the batter rest for a minute.

Fill a ¼-cup measuring cup about ¾ full for each pancake (about 3 tablespoons batter). Cook the first side until bubbles are forming on top, the edges begin to set, and the bottom is golden brown, about 2 minutes. Flip and cook another minute. Grease the pan again as needed. Move the cooked pancakes onto the serving plate, keeping them warm in the oven until ready to serve.

Serve with your favorite toppings.

Home-made granola

Hola, Granola!

Score one in my column. For years, my family insisted on eating bagels most weekday mornings. In terms of nutrition, bagels are more or less Jewish Wonder Bread: tasty but empty calories. There just aren’t a whole lot of health benefits in poppy seeds and sesame seeds. But they rejected other, healthier choices, like whole wheat toast and whole wheat bagels. The price of bagels has steadily increased over the years, and because I buy them by the dozen, that’s almost $10 a week! I’m cringing even as I type this…. I feel like I’m channeling my mother complaining, “Ah-ya! I remember when bagels were 4 for a $1!” But it’s not just about the cost, Ma, really! There just had to be a better way.

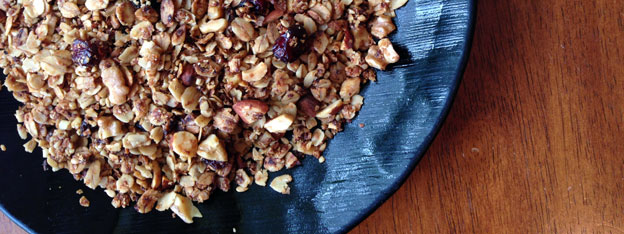
This is where granola takes the stage (skip the chit chat, and go straight to the recipe). I resisted making granola for years. We all love it, but I don’t usually buy it at the grocery store, because it doesn’t feel like a great value. After all, granola essentially is oatmeal minus water, but making it felt like too much work. Not that I actually knew how much work it would be since I’d never made it. Well, I must have had 10 free minutes on my hands in February, because I finally rolled up my sleeves and did it! I had all the ingredients on hand. It turned out to be easy and delicious! And everyone ate it the way people eat Cracker Jacks. I’ve made a handful of batches since then, refining the original recipe to get the perfect balance of toasty nuttiness and sweetness. The DH has switched to eating my homemade granola with milk on weekday mornings, and the DD and DS make homemade yogurt parfaits with the granola, fruit, and plain yogurt. We all eat it straight up or with milk as a snack, too.

What was my mental block against making granola about? Maybe it was an unconscious resistance to shedding another token of my New York City girlhood. I know, there are lots of “iconic” New York foods—it’s a big city—but bagels are it for me. In its place, insert granola, a (tie)dyed-and-true Northern California hippie emblem. Heck, I’ve only been living here for 20+ years. Probably not, but don’t you love the symbolism of it?

OK. Crazy Foodie time: does making my own granola actually save money? I did a bit of calculating to find out. There are about 8 ½-cup servings in one pound of granola; that’s $5.79 for 4 cups. My granola cost $8.65 for 7 cups—see my calculations below (the only ingredient I didn’t include in the cost analysis is salt)—or $4.94 for 4 cups, which is 17% less than the store-bought stuff. Of course, that doesn’t include cost for energy, water and detergent, or my labor. [Update: this cost analysis was based on an earlier version of my recipe. I've since substituted brown sugar for the honey, and I now add fewer nuts and dried fruits, which should bring the cost for ingredients down.] When it’s all said and done, it’s not a huge cost savings, but now that I know how easy it is to make, I’m going to keep making my granola anyway (and the kids are helping out, too!)—it just tastes better when it’s homemade.

Recipe: Granola

Makes about 10 cups

Ingredients

  • 4 cups rolled oats
  • 1 cup steel cut oats
  • 1½ cup raw wheat germ
  • ⅜ cup flax seeds
  • 1¾ cups chopped raw nuts (almonds, walnuts, or pecans)
  • ½ cup brown sugar
  • ¾ teaspoon salt
  • ¾ cup canola oil
  • 1½ tablespoon vanilla extract
  • 1½ cups mixed dried fruit (cranberries and raisins)

Preparation

Preheat oven to 325°F with the oven rack in the middle of the oven. Line 2 roasting pans with parchment paper.

In a large bowl, stir together the first 7 ingredients (all the dry ingredients except the dried fruit). Stir well to combine. Add the oil and vanilla, and stir again. Spread the granola evenly onto the roasting pans.

Bake the granola for 30-35 minutes, stirring every 10 minutes and switching the position of the pans each time. The granola is done when it is golden brown and fragrant. Mix in the dried fruit as soon as the granola comes out of the oven, then allow the granola to cool completely in the roasting pan. Store granola in an airtight container. Granola can be frozen.